TL;DR
Introduction
Docker is here to stay. And if you are considering to go forward and move your infrastructure to Docker, there are a few relatively painless ways to do it. At first, we’ll have to setup your local environment in order to work with Docker. From there, we can proceed to setting up docker-files for deployment and running your tests (unit tests, API tests, BDD tests etc). As a project example for this guide, we’ll be using a demo WebAPI project with dotnet core 3.1 (GitHub link).
Prerequisites
Install following on you machine:
Add Dockerfile for deployment
In order to add Docker support to the project we’ll need to configure a dockerfile. Visual Studio and docker tools can help us out. In VS you can add Docker support to a new projects or add it to an existing project. This will simply generate a default dockerfile for dotnet to your project.
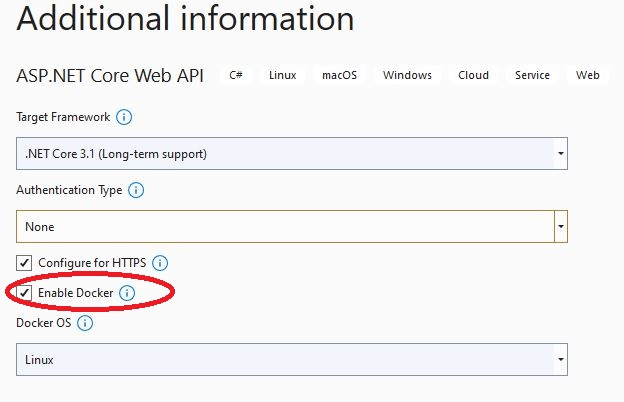
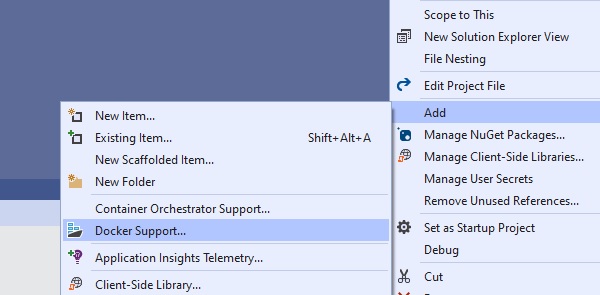
Dockerfile
Once a dockerfile is added it should look like following. In a case of HelloWorld example, I’ve moved my Dockerfile to a root directory of a solution folder instead of a project folder. You can always change the location of your Dockerfile, as long as you track the correct relative paths to your .csproj specified in the Dockerfile commands.

Docker build
As depicted in the previous picture, each COPY, RUN or ADD command will ultimately become a building block (aka layer) for the resulting docker image after build is performed. Think of it as the frosting layers around the cake. These layers remain cached and are being reused, unless there are new changes involved. In order to build image locally run docker build -t helloworld . within the Dockerfile folder. After that you can run docker images to list all docker images and find your image name. Use image name within command docker inspect helloworldapi. As the output of the last docker command you should see following layers contained in your image:

Docker run
Once built, you can run docker container locally with docker run -d -p 80:80 helloworld. Make sure you use the same ports that are used within Dockerfile’s EXPOSE command.
Debug with Docker
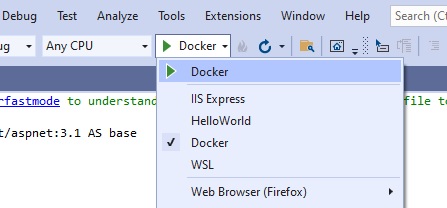
The same dockerfile configuration can be used for debugging. If it’s not already automatically added by VS your Properties/launchSettings.json should look like this. In order to use Docker for debug, Docker section of configuration is necessary:
{
  "iisSettings": {
    "windowsAuthentication": false,
    "anonymousAuthentication": true,
    "iisExpress": {
      "applicationUrl": "http://localhost:59520",
      "sslPort": 44389
    }
  },
  "$schema": "http://json.schemastore.org/launchsettings.json",
  "profiles": {
    "IIS Express": {
      "commandName": "IISExpress",
      "launchBrowser": true,
      "launchUrl": "weatherforecast",
      "environmentVariables": {
        "ASPNETCORE_ENVIRONMENT": "Development"
      }
    },
    "HelloWorld.API": {
      "commandName": "Project",
      "launchBrowser": true,
      "launchUrl": "weatherforecast",
      "environmentVariables": {
        "ASPNETCORE_ENVIRONMENT": "Development"
      },
      "applicationUrl": "https://localhost:5001;http://localhost:5000"
    },
    "Docker": {
      "commandName": "Docker",
      "launchBrowser": true,
      "launchUrl": "{Scheme}://{ServiceHost}:{ServicePort}/weatherforecast",
      "publishAllPorts": true,
      "useSSL": true
    }
  }
}
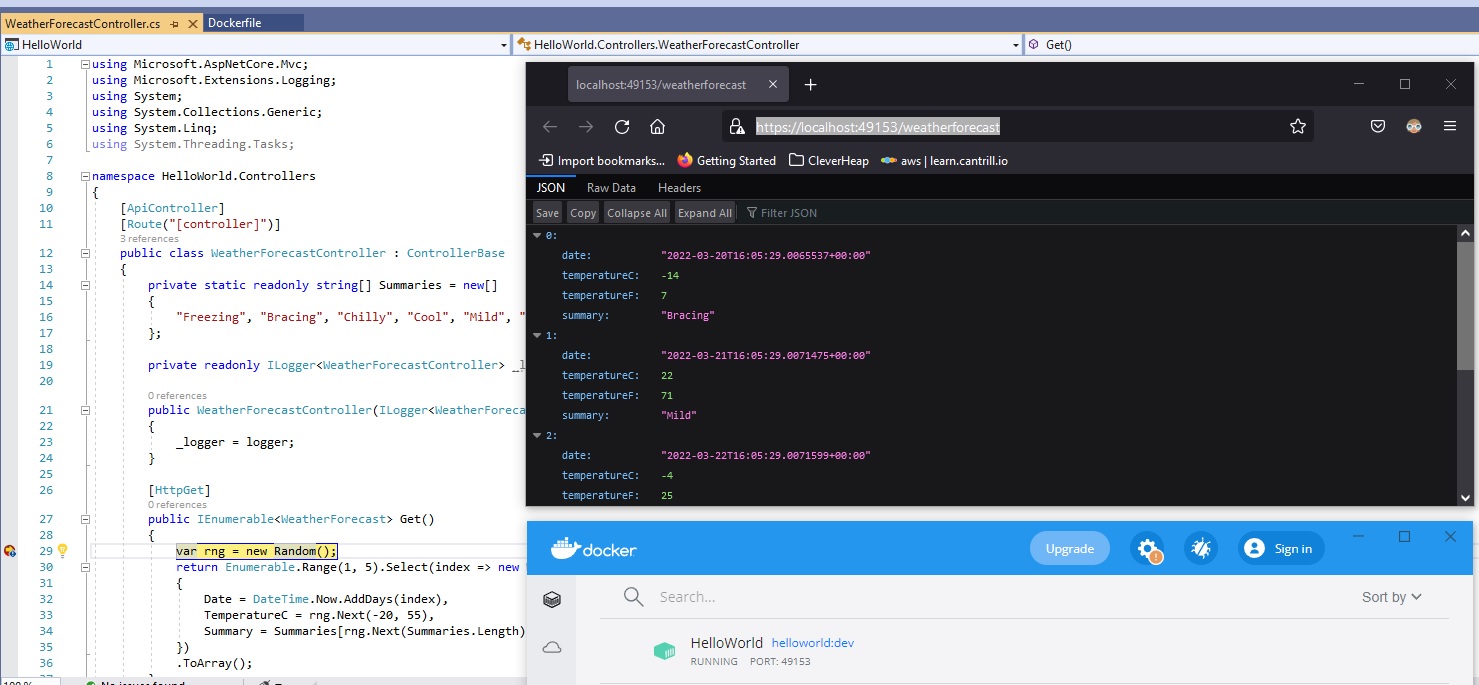
Once launchSettings is in place, you can use VS Debug > Docker action.
Add Dockerfile for testing
Within the HelloWorld project sample we have two test projects (HelloWorld.BDDTests, HelloWorld.UnitTests). For this purpose of demonstration we are using a single docker for running both test projects. However, you might choose a different approach such as a docker per test project, but the underline configuration would be similar.
After adding another dockerfile named Dockerfile-tests (naming is totally arbitrary) we can edit the file accordingly with dotnet commands that will run tests:
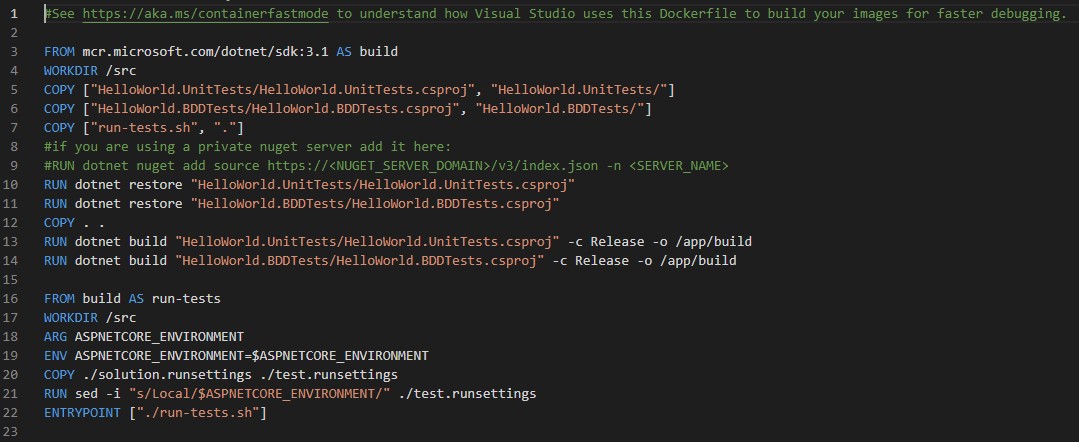
At the build section we copy projects and the shell script in order to prepare test projects for running tests. From here we run dotnet restore to restore project dependencies and dotnet build in order to make sure our test project is ready and without any compile time errors. Shell script run-tests.sh is just a collection of dotnet test commands for each project.
#!/bin/bash

dotnet test --settings ./test.runsettings -c Release "HelloWorld.UnitTests/HelloWorld.UnitTests.csproj" --logger trx --results-directory /app/testresults -l:"console;verbosity=normal"
dotnet test --settings ./test.runsettings -c Release "HelloWorld.BDDTests/HelloWorld.BDDTests.csproj" --logger trx --results-directory /app/testresults -l:"console;verbosity=normal"
In run-tests section we have an environment configuration steps required to run test for the specific environment (e.g. dev, integration, staging). You might not need this at the moment, but in some cases your test projects might contain different application settings for different environments. In my personal experience this is mostly the case when we integrate with different 3rd party APIs. The environment setup is pretty simple:
- first environment variable is received and set from an argument passed within
docker runcommand (we’ll see example in the following text) - then the current solution.runsettings is copied-renamed and altered to set the correct environment in this run settings file (i.e. sed linux command)
- after that
dotnet testcommands use this settings in order to resolve actual application settings per environment (see shell script above)
In order to run tests in docker perform following:
- Build Docker image:
docker build --build-arg ASPNETCORE_ENVIRONMENT=$ASPNETCORE_ENVIRONMENT -t helloworldtests -f Dockerfile-tests . - Run Docker container:
docker run -d helloworldtests
To see test results you can use Docker Desktop to view container logs:
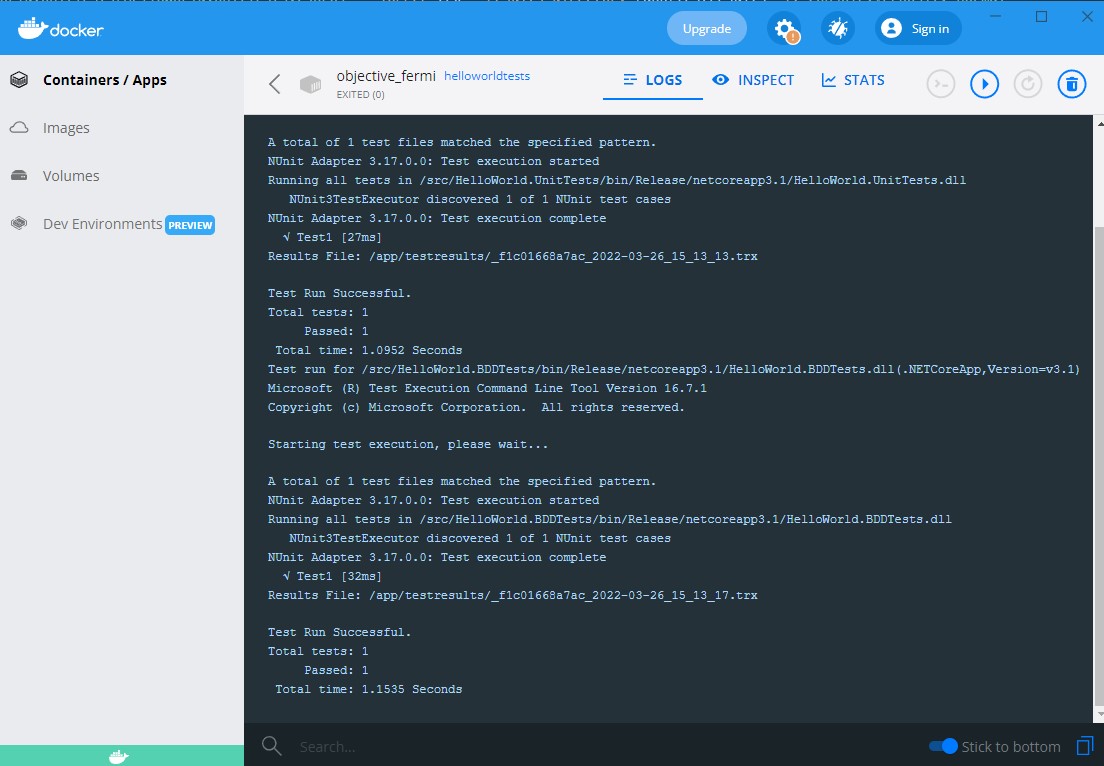
Or you can use following docker commands:
docker psto check your container IDdocker logs <CONTAINER_ID>to display container logs
Run in test and production environments
The best part is that you won’t need to change anything differently that you already have for your local environment. All that remains is to prepare buildspec.yml for your deployment pipelines. You can also add test steps to the pipeline and run the same docker container like you did locally. Most of the pipelines will respond well to docker commands and exit codes, so you have an indication when your build fails (e.g. docker build fails due to mistake in dockerfile), some tests are failing or test coverage is below expected threshold.
 CleverHeap