Introduction
Maybe you feel the need to ignite that spark of creativity again? And if gaming is something you like, you probably thought of creating one? The ways you can get creative in a game design are versatile: story telling, animation, character design, level design, ambient lighting, music or sound effects…
Anyhow, designing a game can still get overwhelming and tedious at times. So it is important to remember that no matter how difficult obstacles in learning can become, be forgiving to yourself and frequently remind yourself of creativity that guided you to this path in the first place. When you find yourself stuck, you can always take a break from programming complicated game mechanics and do story writing instead, or work on new drawings that might become assets in your game. That diversity of options we can do in our games are what it makes game development so appealing. You can get dreamy about stuff and create your own small worlds.
In these series beginning, we’ll introduced you to some basic concepts of Unity, which will allow you to make your first 2D game. The game we will be building is a simple fishing game, where a player is driving a fishing boat, catches fish and finally delivers it to the restaurant. Disclaimer: it won’t look like much, but… that’s the whole point. Where we stop, your imagination should continue.
Background
There are many tools and game engines in the market today that will allow you to build your games for free. In this blog post series we decided to use Unity which is popular and frequently used by both beginners and professional game developers. Also, there are a lot of content and learning materials online that you could use for further studying, so it appeared as a viable first choice.
Prerequisites
Before we start we’ll have to install few things on our computer:
- Unity Hub
- Unity Engine
- Visual Studio Code
Install Unity Hub
For starters visit Unity and download what is called Unity Hub Setup. Once downloaded, run it by double clicking and accept terms and conditions. This will now install Unity Hub to your computer. Once Unity Hub is installed start it up and login with your Unity account. On the first login you will be prompt to accept Unity Personal license which is a free tier for Unity users. Click agree and proceed to Unity Hub dashboard.
Install Unity Engine
Unity Hub is, simply put, a repository for all of your Unity projects. The tool that we actually use for making and running our games is Unity Engine. Go to Installs section and choose from Official Releases tab, the latest version of Unity Engine that holds Long-Term-Support tag (LTS).
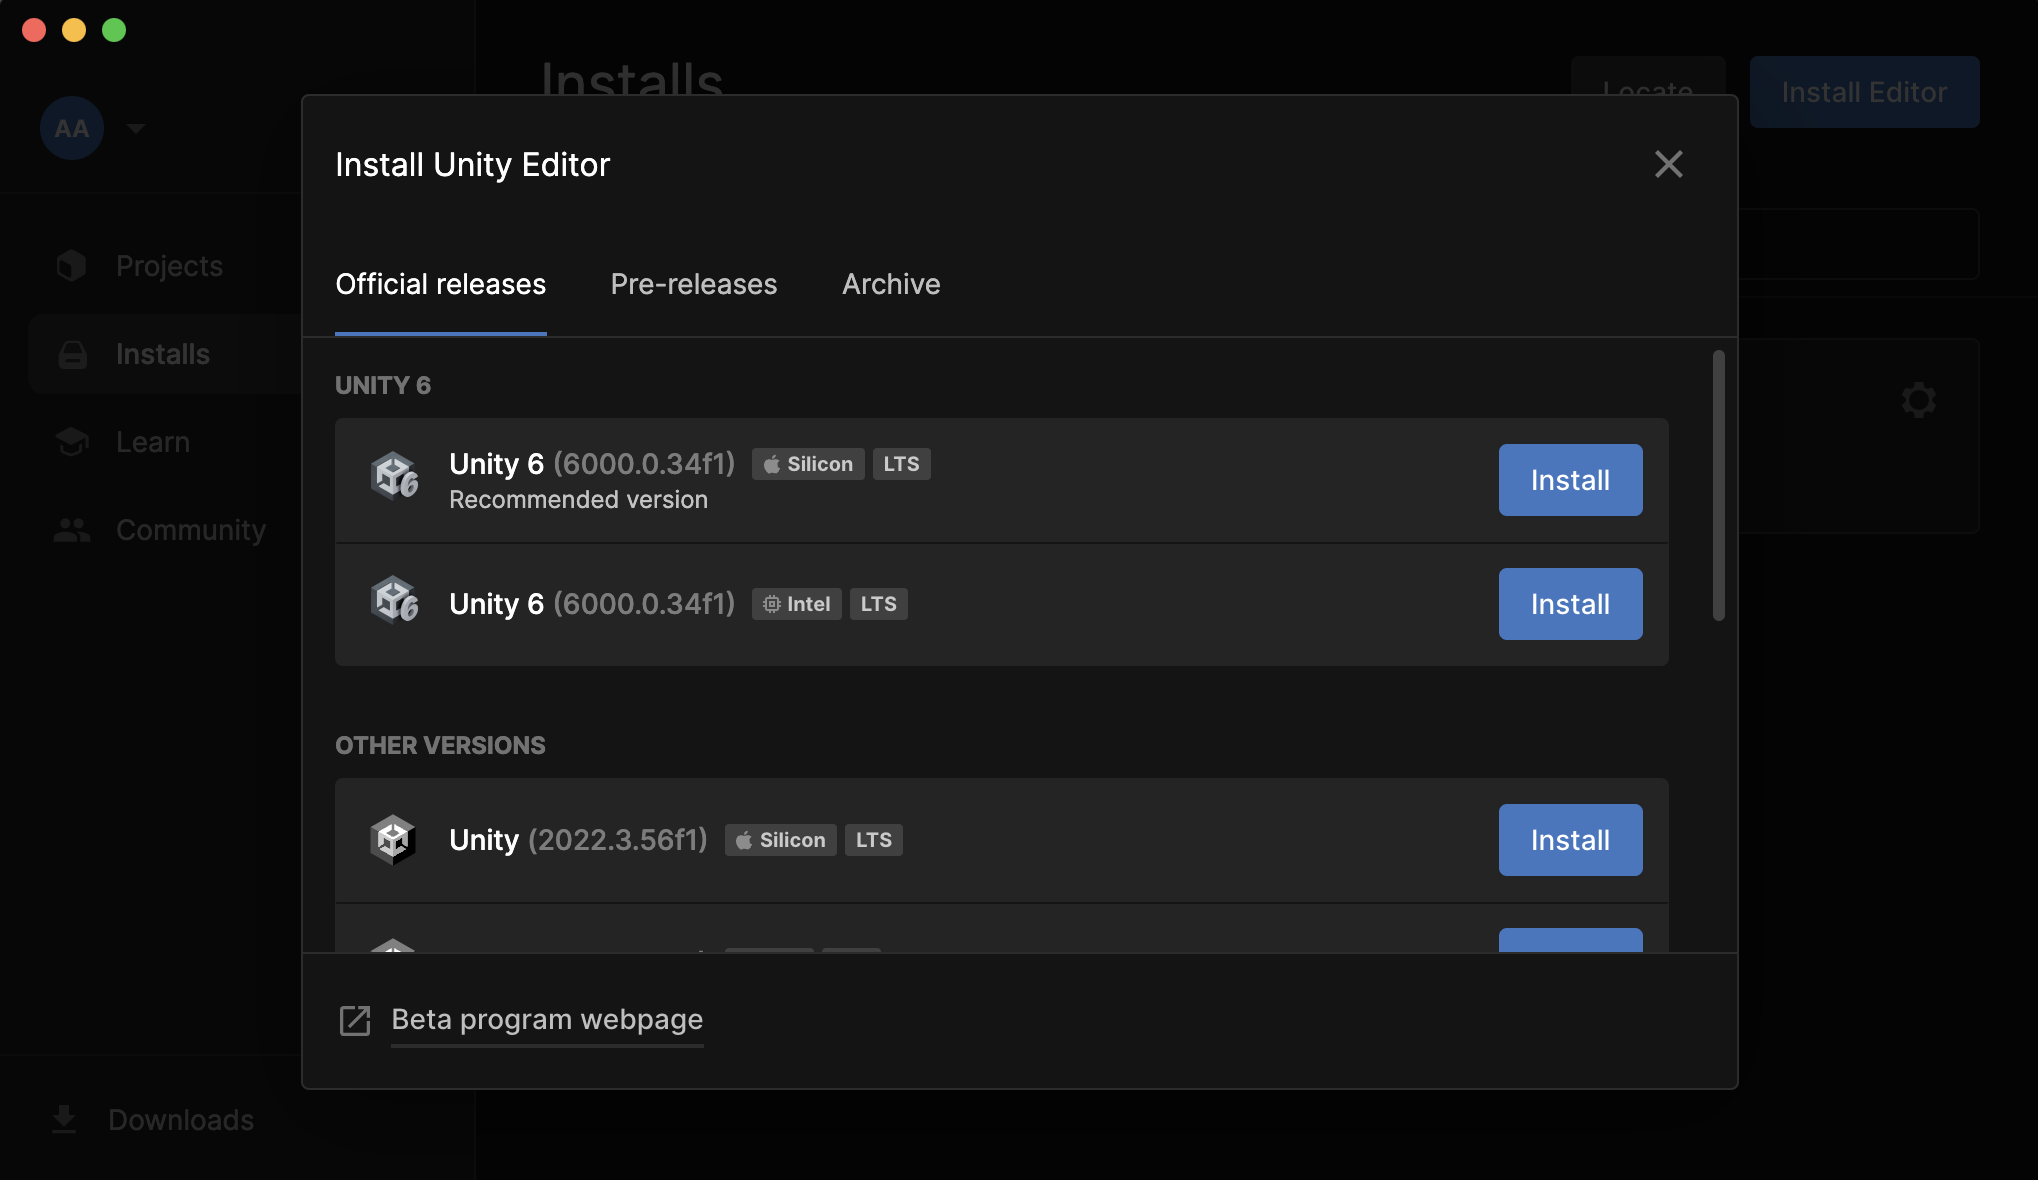
On install, the Hub will suggest you list of additional modules. Chose Visual Studio Code and proceed. Once installed we can continue to creating our first project.
Create Unity project
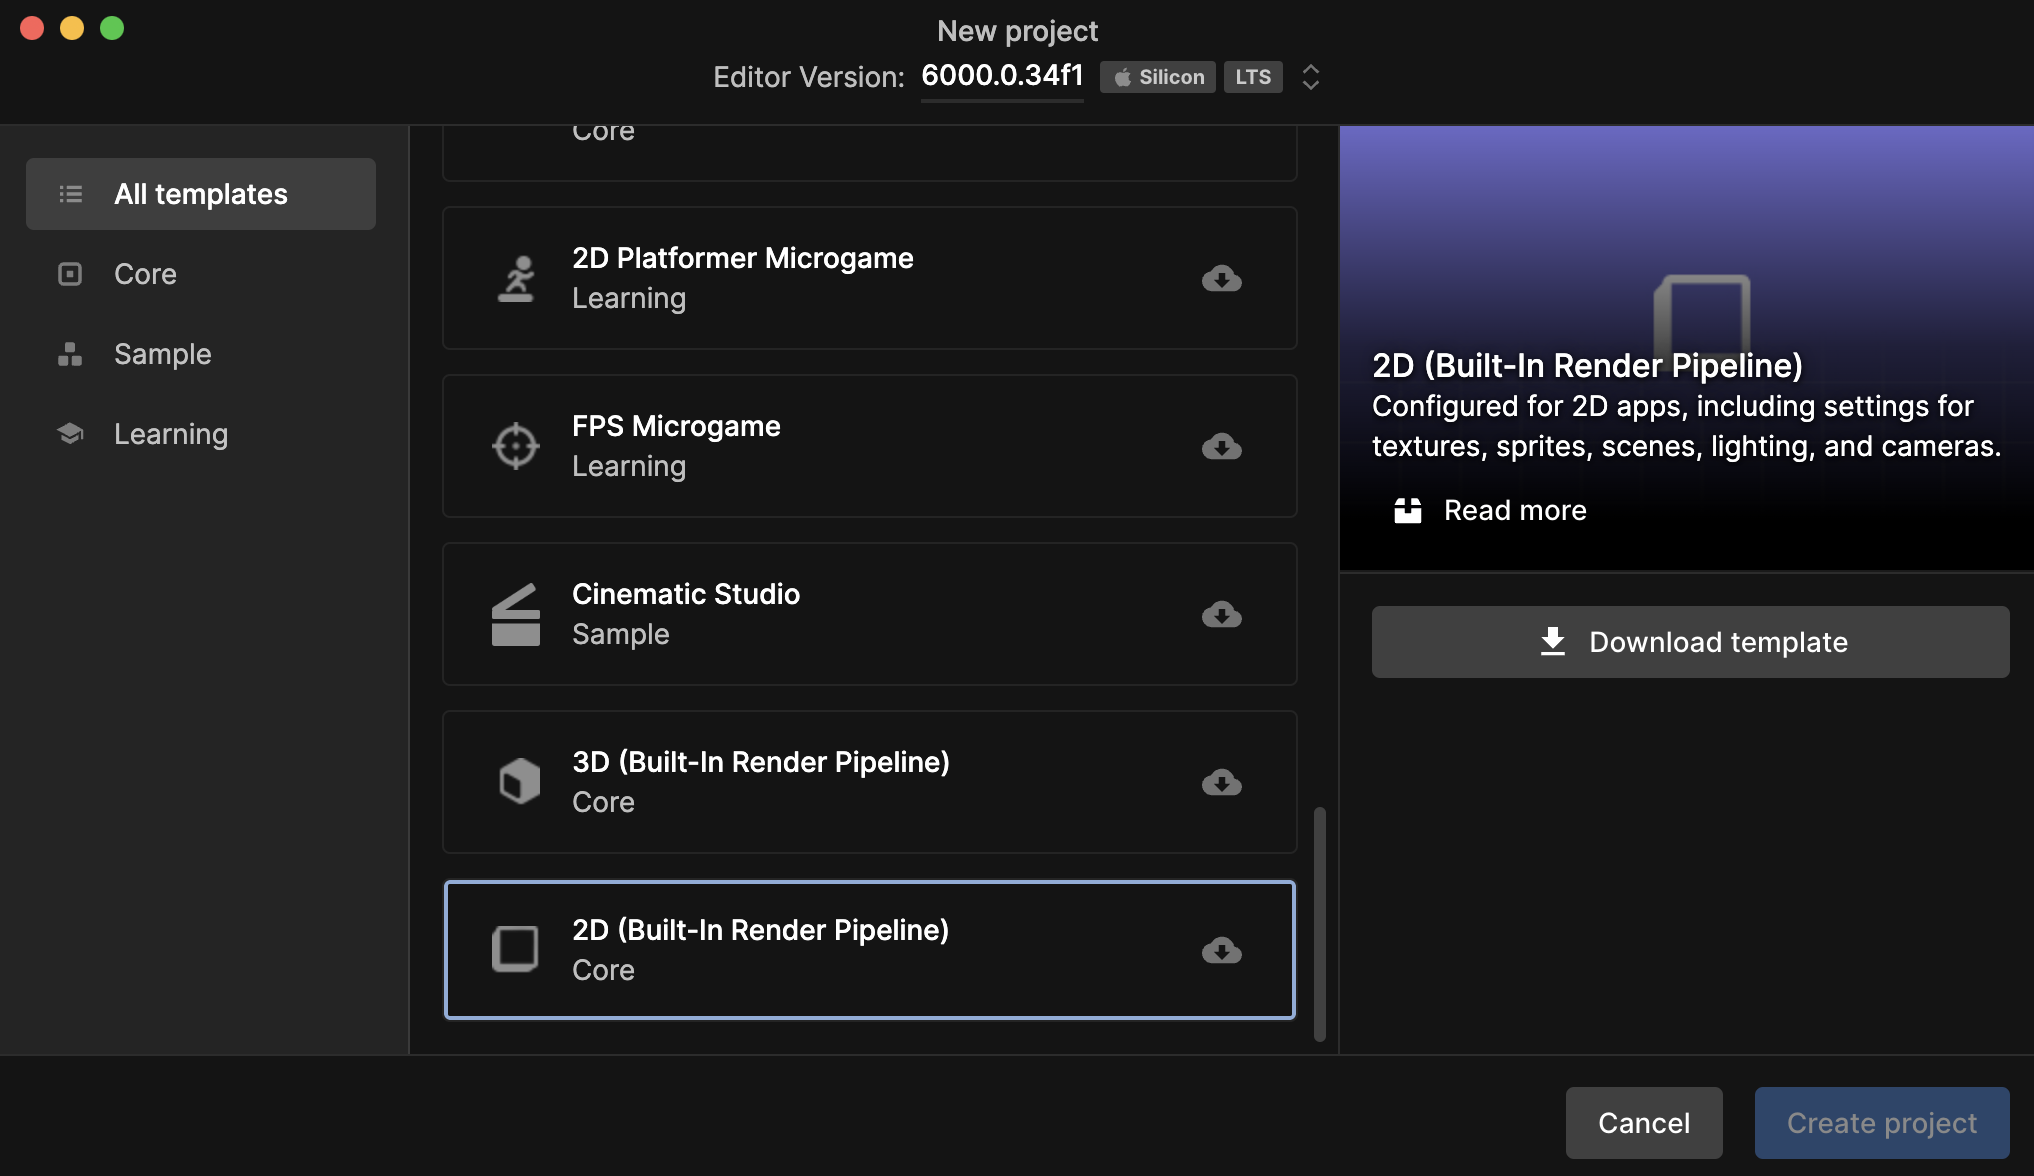
Once you start Unity Hub, in Projects section click New Project. From suggested templates list choose 2D Core (Built-In Render Pipeline). If the template is disabled, click download to fetch necessary resources. For the next step, proceed to naming your project and set folder location. When ready, click Create Project and wait for project to setup.
Everything is a pancake
Once the project setup is complete, you’ll notice that the scene component will take the most space of your Unity editor. Scene is basically your main canvas where you’ll add your game objects and configure their interactions.
Let’s go ahead and add a game object to the scene. In order to do that, perform right click on your main scene in Hierarchy menu and navigate to Capsule game object. Clicking on Capsule will add that game object to your scene.
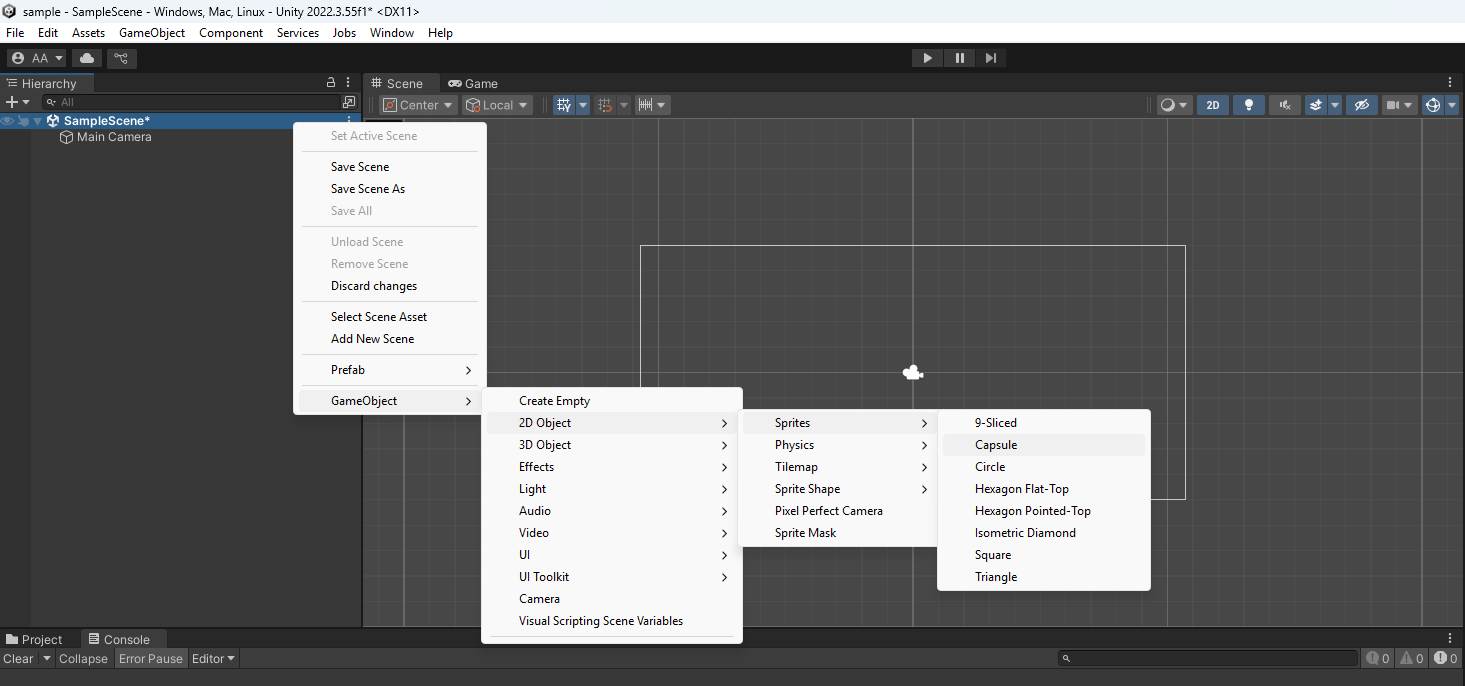
Once you added the Capsule object to your scene. You can use different tools to resize it, move it or change object’s orientation. On the right hand side, in your Inspector panel you are able to change object properties as well.
Notice that after switching off the 2D toggle at the scene toolbar, the scene becomes tridimensional. Our capsule in 3D looks no different then in 2D since it is of category of Unity’s 2D objects. Therefore, it won’t have any depth, so in 3D setup it’ll look like a thin pancake. Although, it has additional axis, the depth change won’t have an effect on 2D objects.
To delete a game object from the scene, simply select the object by clicking on it and press Delete on your keyboard. You can also use a Hierarchy navigation panel where you can delete previously added Capsule object.
Adding game assets
If you check Project section at the bottom of your editor, you’ll see your project’s folder structure. Under the Packages folder reside all Unity libraries that have been initially setup during project creation. Your game project now depends on these libraries in order to be able to run your game within Unity Engine.
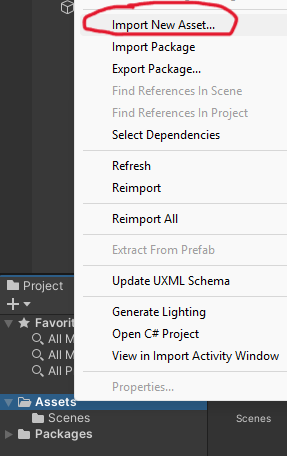
The second folder you’ll notice is called Assets. In this folder you can place different resource files like images, animations, sounds which you can use in building your game. For start, download zip file from this link. As you extract the downloaded archive, you will find several image files in it. Go back to your project and import those image files to your Assets folder by right clicking on Assets folder and choosing Import New Assets.... Choose all extracted files and import.
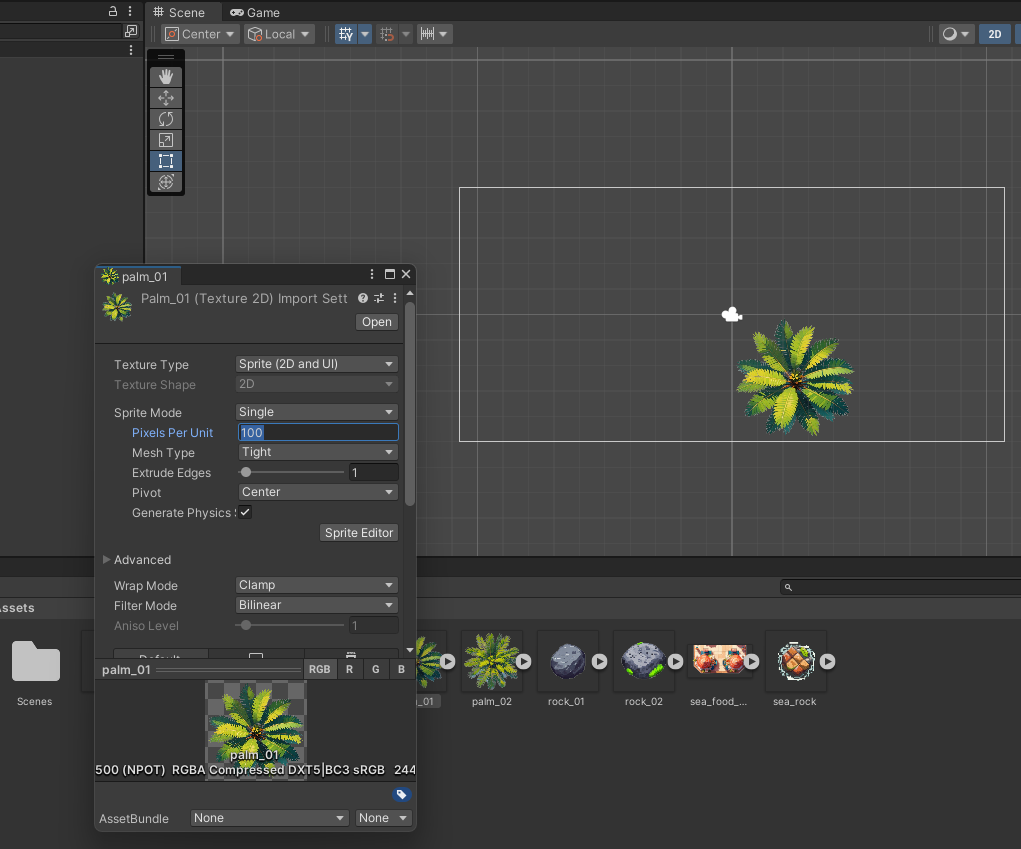
Now you can go ahead and drag and drop one of the assets to your scene frame. Sometimes, you will notice that some of the asset sizes don’t correspond well with proportions of the other assets. if this is the case, perhaps you would like to set their default size to reasonable measures. You can do that by changing Pixel Per Unit value which you will find under Asset’s Properties. To make it smaller, lets say half the current size, you can change value from 100 to 200. To make it bigger, like twice the size, you would change the value from 100 to 50.
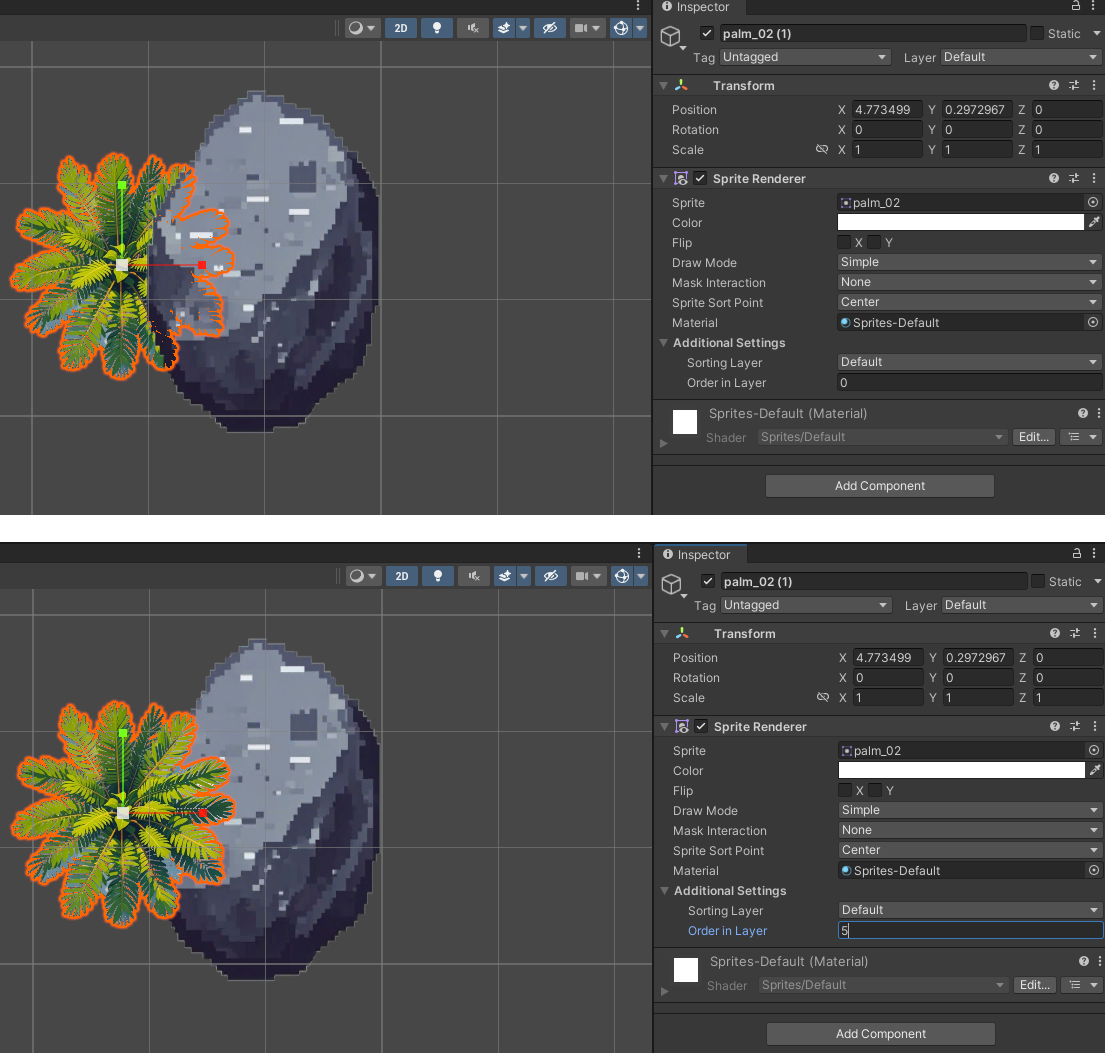
Once you handled the asset size, you can compose your own map by dragging and dropping assets to scene frame. In case your object needs to cover other object, this can be achieved by changing Order in Layer value in objects properties. The higher number of a palm tree object indicates a higher layer level from the one a rock object has (those layers resembles to a stack of plates).
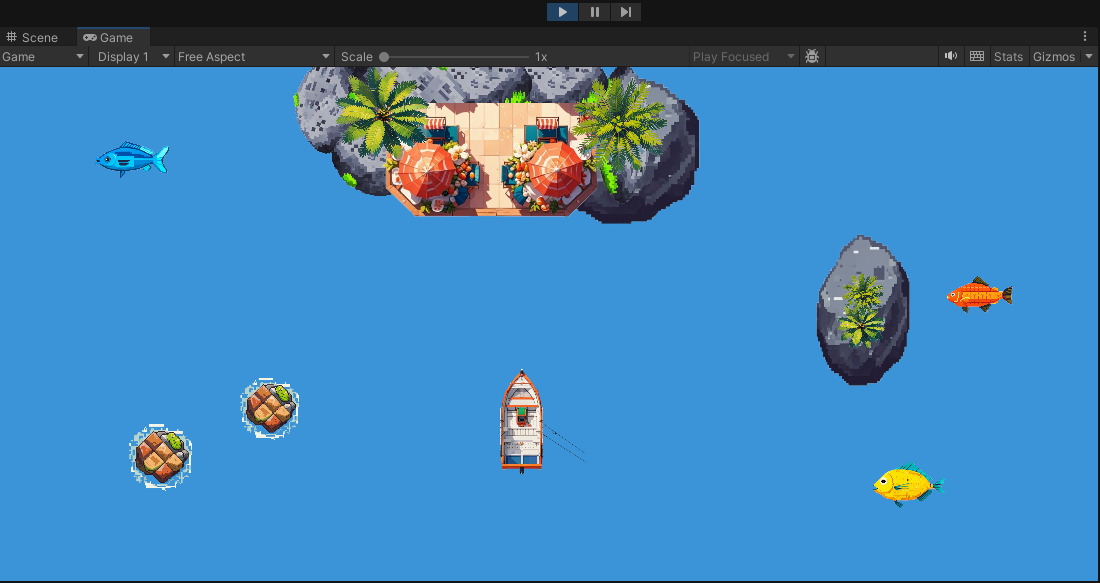
After composing a map, mine looks something like this, but yours can look totally different. For simplicity purposes make sure we have one restaurant and one fishing boat in our game.
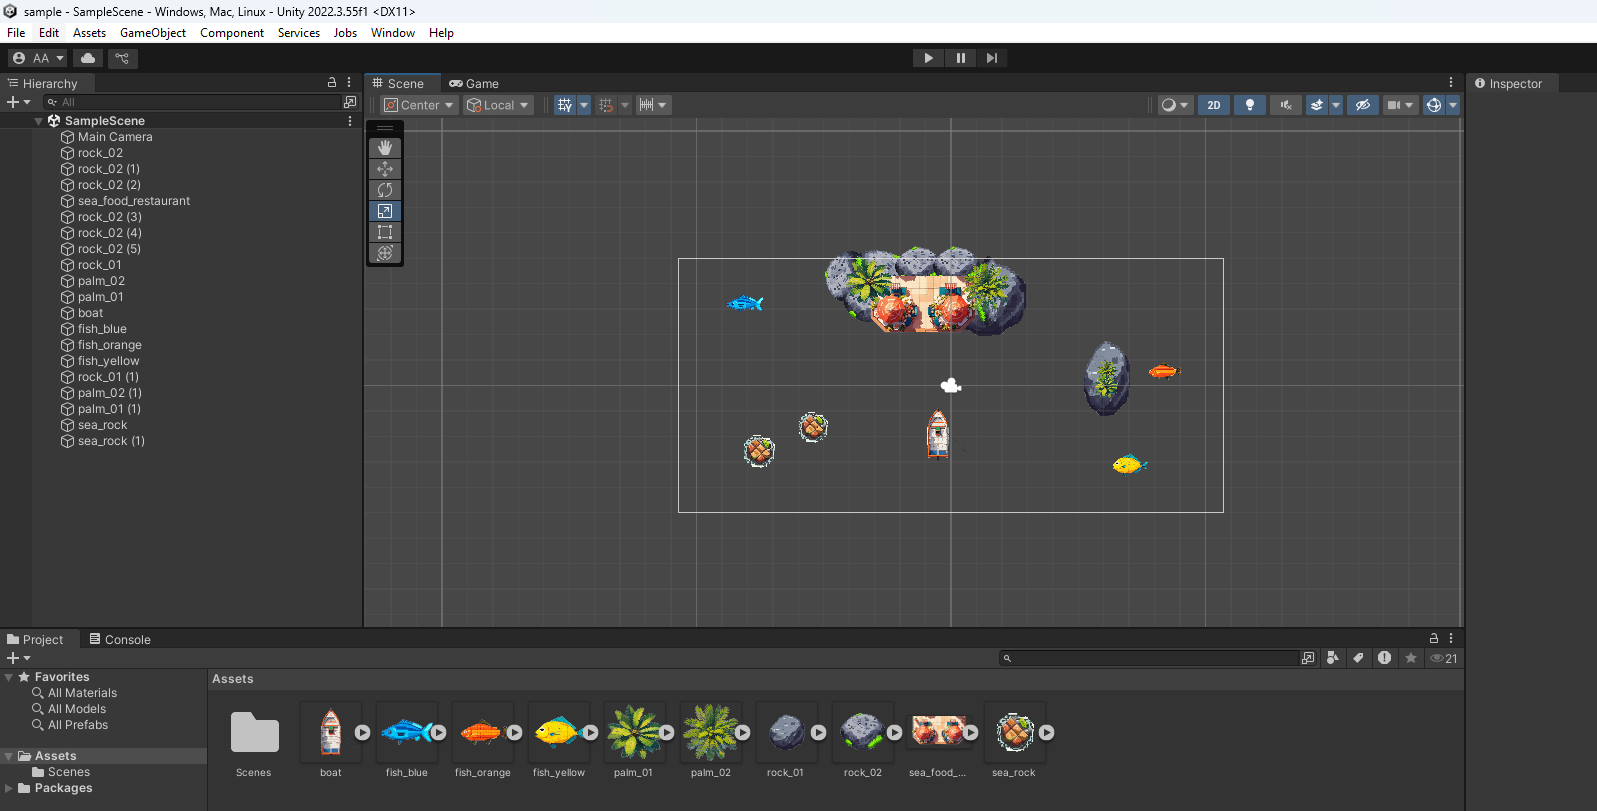
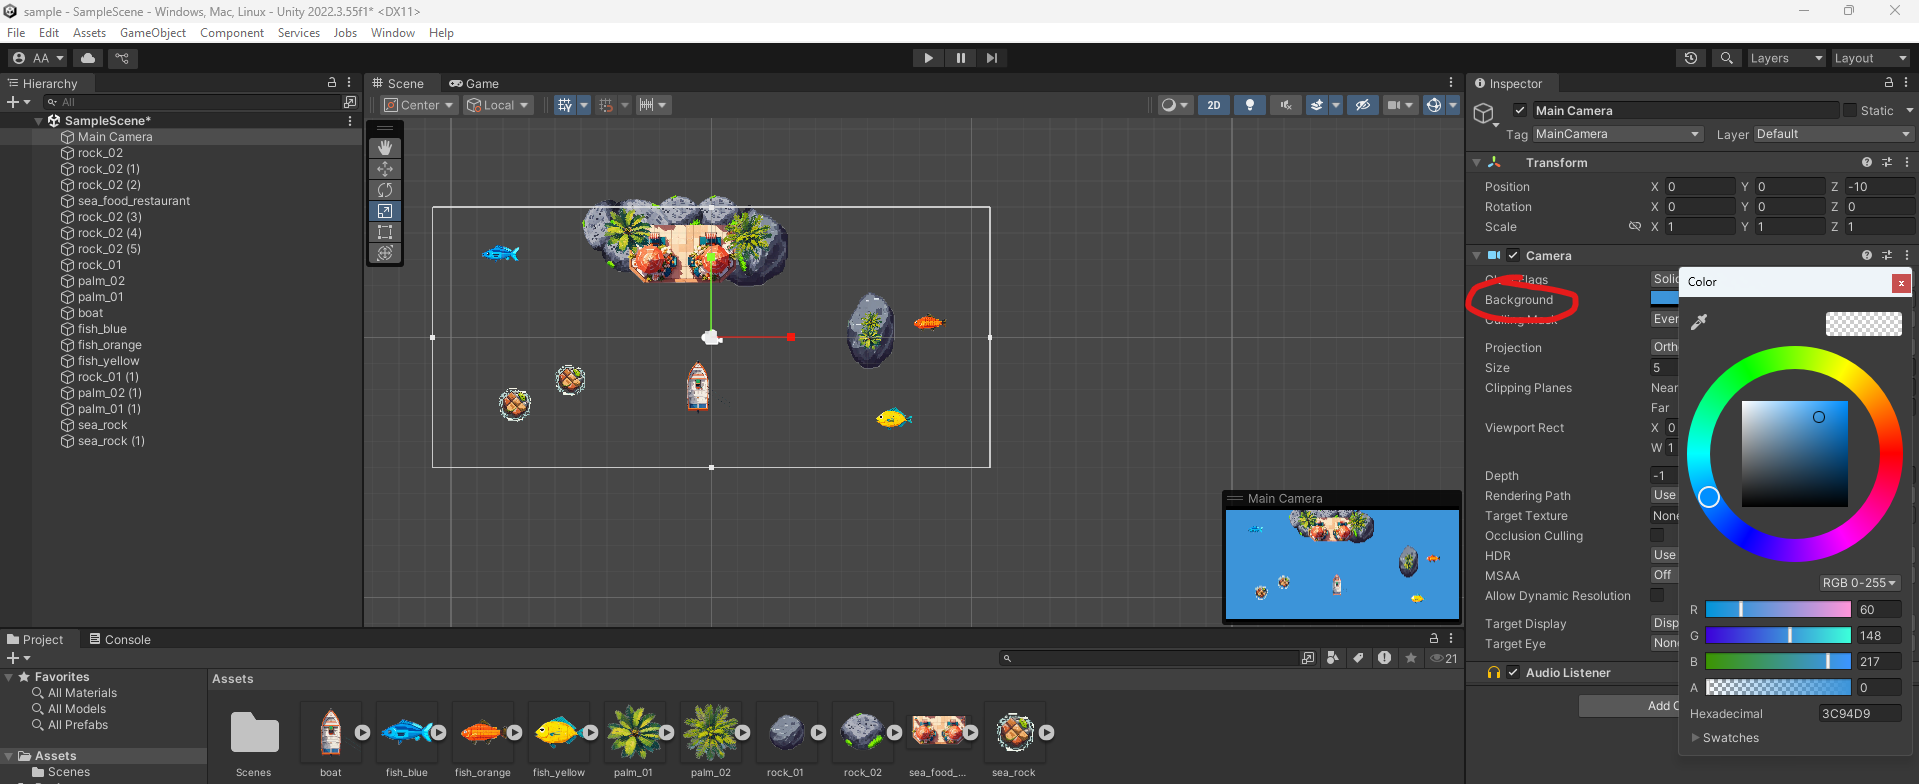
As a final touch, we can set up a default background color for our game. This is achieved by selecting a Camera in your scene and changing the Background property. From a color picker select a shade of blue to indicate a water as an element. This background color will then fill the void between the objects.
Now if you click play button you will run the game and be able to see something similar.
Conclusion
In this part of the series, we hopefully managed to create a simple 2D map using static image assets. In the following posts we’ll add a behavior to our boat so we are able to ride it using keyboard inputs. Also, we’ll introduce a collision mechanism between objects demonstrated in our game as solids: rocks, trees and infrastructure.