Introduction
In the previous post, we started our work on implementing a very simple fishing game. The goal is to ride a fishing boat to catch fishes and deliver them to the sea food restaurant. We imported all necessary sprite assets and made a simple map that should include one restaurant, a boat, several fishes and a few environment obstacles to make the game environment a little bit more challenging. In this post, we’ll explain how to add a driving behavior to our boat and how to make our boat followed by the Main Camera.
Prerequisite
In case you haven’t already installed Visual Studio Code1, please follow the next steps:
- Install Visual Studio Code by downloading from here and install the program to your computer.
- Run Visual Studio Code and install following Unity extensions:
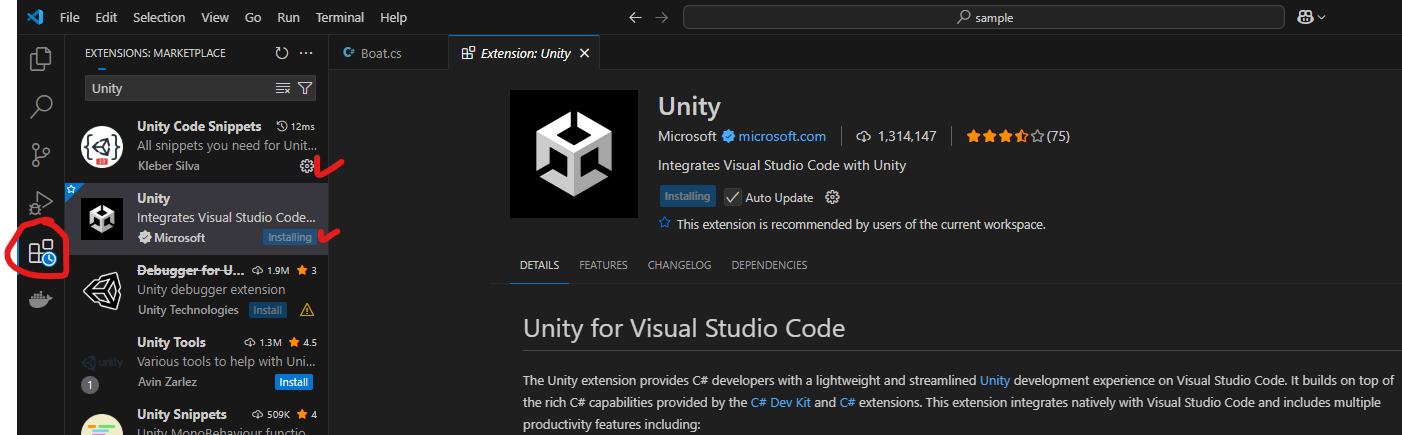
- Open Unity Editor with your game project and go to Edit > Preferences in toolbar menu. Set Visual Studio Code as your default script editor. In your case, you might see a different version number for VS Code since the latest release might have changed by the time you started following these steps.

Scripting
In order to enable a behavior to any game object, we’ll have to get familiar with Unity scripting. A programming language that is used in Unity is called C#2. It is an object-oriented language, which gives us an opportunity to conveniently express our game objects behavior through code. Let’s start by adding a new C# script file.
Create a new script
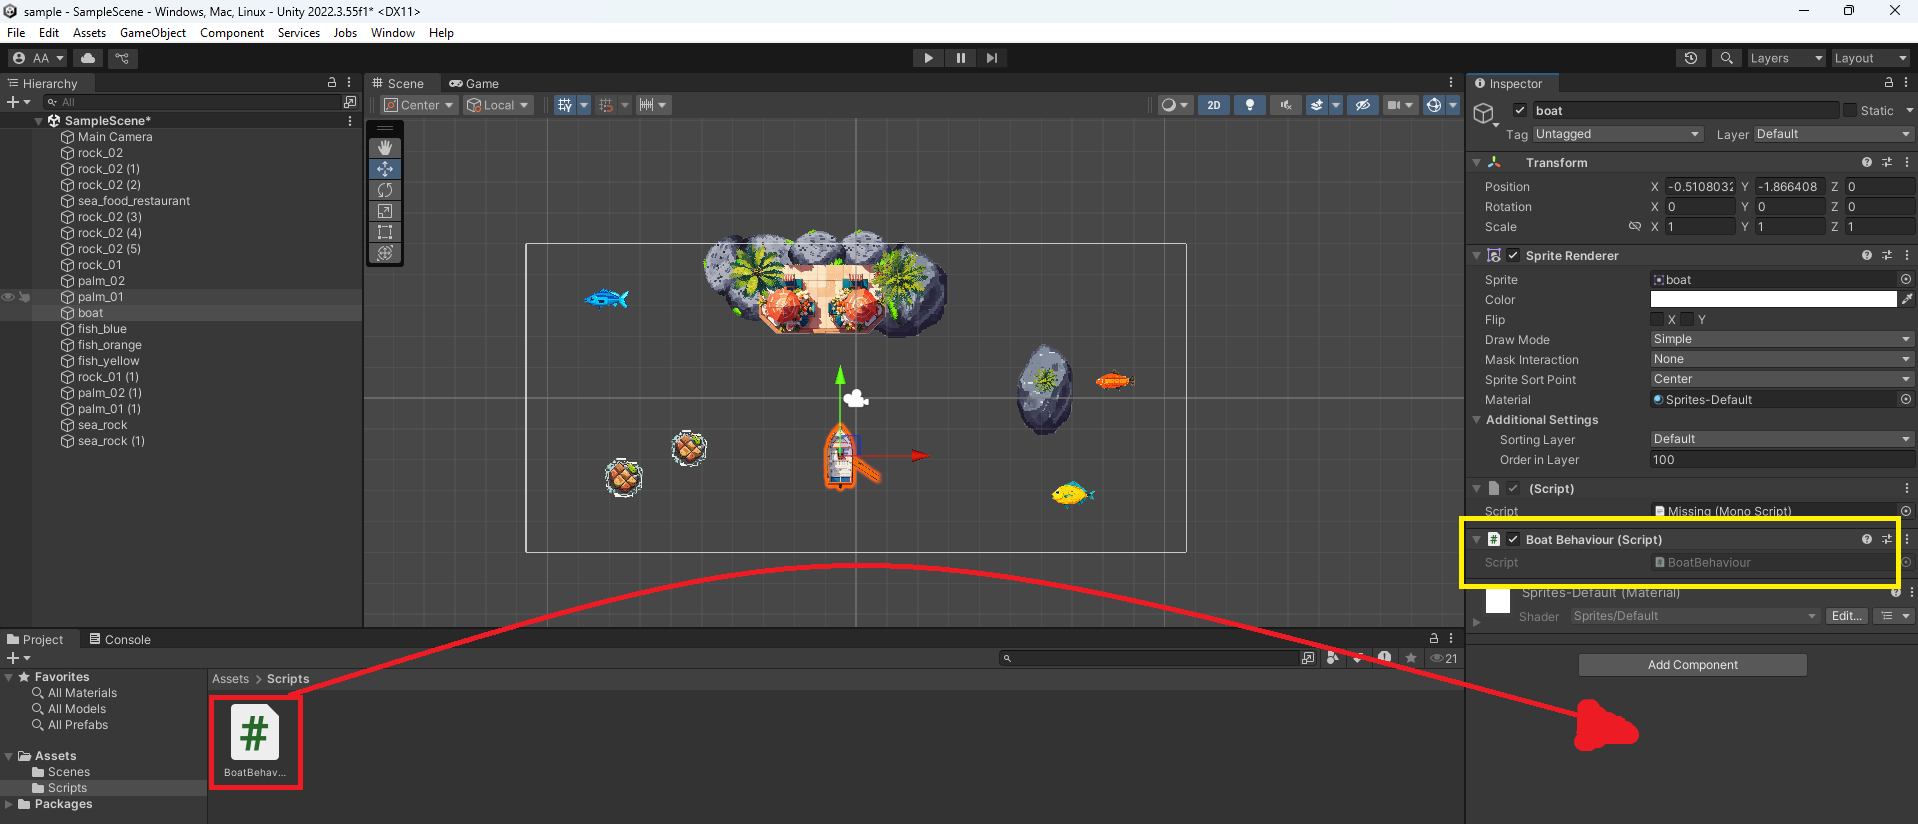
In Assets folder do right-click and create a new folder where we’ll place our C# scripts. The folder name is arbitrary, but for purpose of this tutorial let’s name it Scripts. Now, you right-click on scripts folder and create a new script file. Name the file BoatBehaviour.

Once the script is created, you can double click it and it will open a project solution in your Visual Studio Code. Looking at the C# script you can already notice the Unity auto-generated a skeleton code for you. First thing you can notice is that the script name matches your class name public class BoatBehaviour. Class is a definition with which we frame the behavior rules for our game objects. The part of the code that states : MonoBehaviour means that we want to extend the existing behavior of games object which all Unity game objects already have by default.
using System.Collections;
using System.Collections.Generic;
using UnityEngine;

public class BoatBehaviour : MonoBehaviour
{
    // Start is called before the first frame update
    void Start()
    {

    }

    // Update is called once per frame
    void Update()
    {

    }
}
Classes consist of properties and methods. In our generated script, at the moment we only have two methods in our class - Start and Update. Both methods don’t return any result which is indicated by keyword void and they don’t receive any arguments since () are empty. However, altering the internal section of a method {} we define a new behavior for our object. As the comments above method definition already state (see section //), Start is called by the Unity engine only at the game start, while Update is called each time Unity engine renders a new frame at your screen. This means by changing the Update method we can perform actions which will be executed in the real time. Therefor, to enable boat riding we’ll alter the Update method in our BoatBehaviour class.
Boat behavior
The following code represents the changes which reflect movement and steering behavior.
using System.Collections;
using System.Collections.Generic;
using UnityEngine;

public class BoatBehaviour : MonoBehaviour
{
    // Start is called before the first frame update
    void Start()
    {

    }

    // Update is called once per frame
    void Update()
    {
        float steerAmount = Input.GetAxis("Horizontal") * 0.5f;
        transform.Rotate(0, 0, -steerAmount);

        float moveAmount = Input.GetAxis("Vertical") * 0.01f;
        transform.Translate(0, moveAmount, 0);
    }
}
If we edit our C# script as in previous example and then drag that script to properties panel of our Boat object, we’ll add that behavior to the boat.
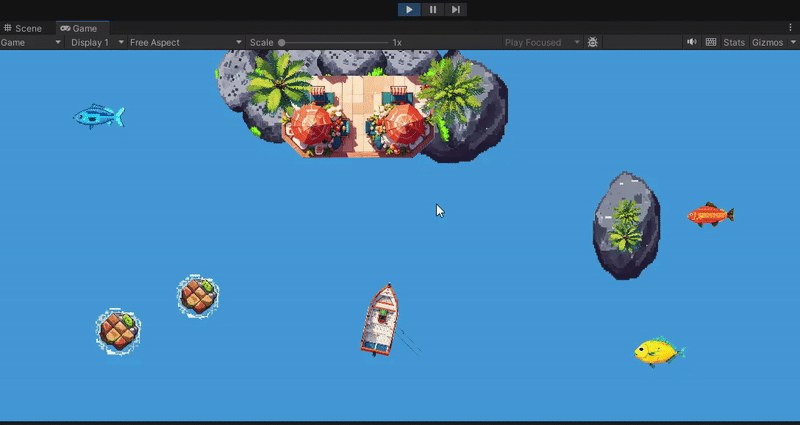
Now you can test it by running your game in Scene editor by pressing Play button.
The Code
Let’s dive deeper in understanding what is coded in here. The boat movement can be defined by two factors:
- steering - whether the boat is directed left or right, which can be represented by objects rotation, and
- movement - changing objects position from one point to the other, which can be represented by objects repositions in the horizontal and/or vertical directions (usually named as translation).
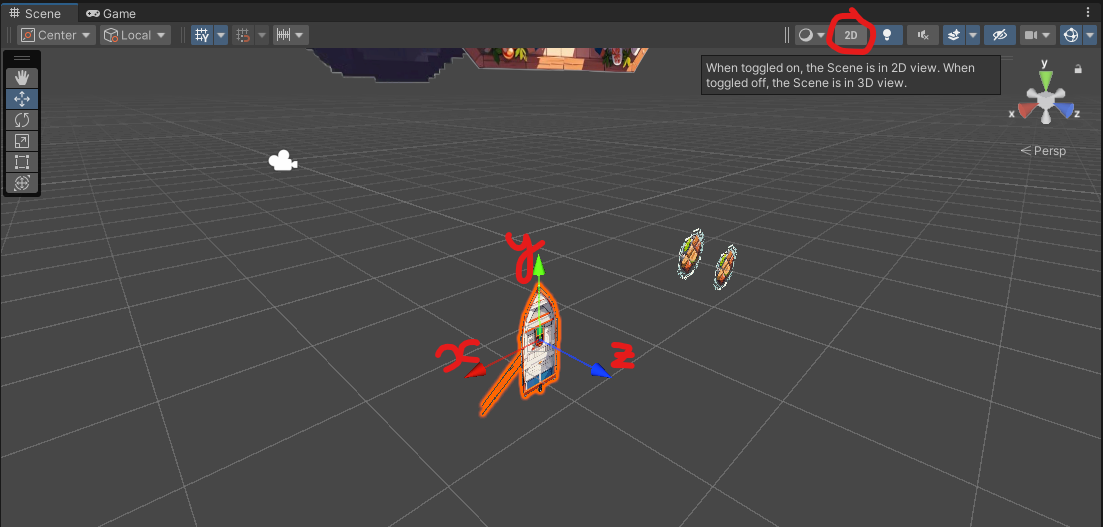
This gives us an idea on how to derive steering and moving formulas. Before we explain how we derived formula for steering and moving lets first remind ourselves on how game objects are represented in Unity coordinated system.
Steering
Looking at the 3D model, we can tell that for steering we can use object’s rotation around the z-axis (blue arrow that represents depth). And to emulate rotation the transform.Rotation(x,y,z) method can be invoked by stating only z-axis value change.
transform.Rotate(0, 0, -steerAmount);
Variable named steerAmount represents a rate of change on z-axis angle. As previously mentioned, the Update method gets called at every frame, which means steerAmount will set a new value each time.
float steerAmount = Input.GetAxis("Horizontal") * 0.5f;
The calculation for the value of steerAmount variable can be seen on the right hand side of the = sign. Input.GetAxis("Horizontal") indicates which of the keyboard keys for horizontal orientation has been pressed.
- If we press a left arrow key on our keyboard (or A keyboard key)
Input.GetAxis("Horizontal")method will return result between 0 and -1 depending how long we press the key. - If we press a right arrow key on our keyboard (or D keyboard key)
Input.GetAxis("Horizontal")method will return result between 0 and 1, also depending how long we press the key. - If none of the those keys are pressed the return result for
Input.GetAxis("Horizontal")method is 0.
Now that we can detect keyboard inputs, if we multiply it by some constant like 0.5f (represents a real number type which in programming languages are often called float) we get an angle value for z-axis rotation. This way, if we hold the right arrow key, in each frame we would rotate for another 0.5 degrees. And if we hold the key for 1sec, since our game is set to run on 60 frames per second (i.e. 60fps), we would rotate it in total for around 30 degrees. Shorter the press, less of the rotation.

It is important to state that we also need to set a negative sign -steerAmount so the rotation direction is correct. In Unity, clockwise rotation on z-axis has a negative value. And since left key press resolves to -1 value, our boat would be right turning instead of left turning. To correct that, we place the minus sign - in front of steerAmount variable so the negative value on left key press would resolve to a positive one (i.e. --0.5f = 0.5f).
Moving
For moving, we use the similar approach as for the steering. However, there are several crucial differences. Based on our 3D model, we can tell that in order to emulate forward and backward movement, we would have to change the y-axis value. Also, instead of steering rotation we use translation.
transform.Translate(0, moveAmount, 0);
Variable named moveAmount represents a rate of change on y-axis. And on each Update, if there is a key press, value will set again.
float moveAmount = Input.GetAxis("Vertical") * 0.01f;
The calculation for the value of moveAmount variable can be seen on the right hand side of the = sign. Input.GetAxis("Vertical") indicates which of the keyboard keys for horizontal orientation has been pressed.
- If we press a up arrow key on our keyboard (or W keyboard key)
Input.GetAxis("Vertical")method will return result between 0 and 1 depending how long we press the key. - If we press a down arrow key on our keyboard (or S keyboard key)
Input.GetAxis("Vertical")method will return result between 0 and -1, also depending how long we press the key. - If none of the those keys are pressed the return result for
Input.GetAxis("Vertical")method is 0.
Multiplier used in case of moveAmount variable is set to 0.01f in order not to accelerate too fast.
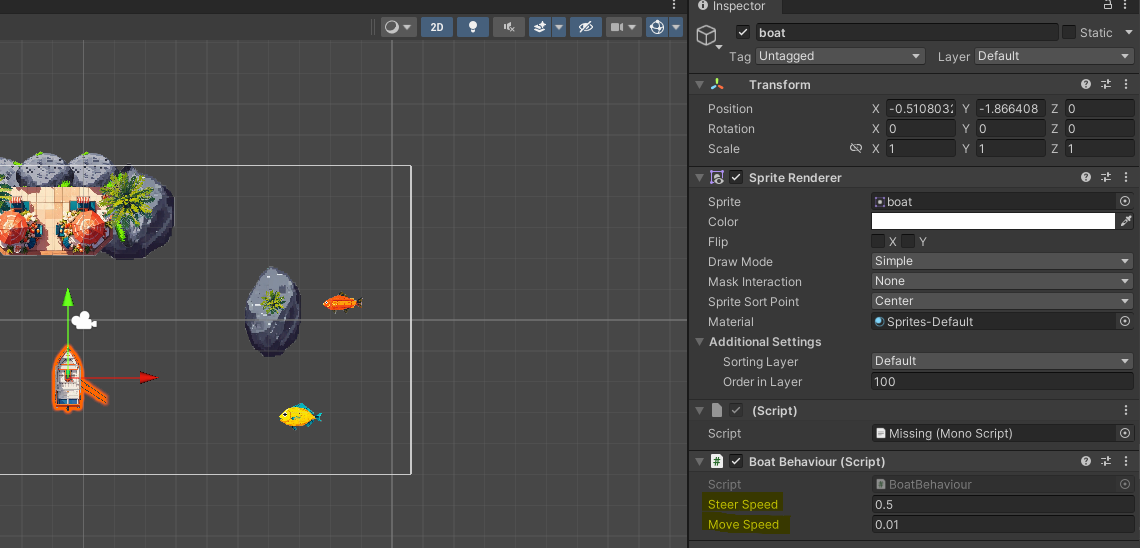
Script properties
If we would like to change our moving and steering constants from object properties, we can achieve that by using class properties and [SerializeField] attribute.
using System;
using System.Collections;
using System.Collections.Generic;
using UnityEngine;

public class BoatBehaviour : MonoBehaviour
{
    [SerializeField] float steerSpeed = 0.5f;
    [SerializeField] float moveSpeed = 0.01f;

    // Start is called before the first frame update
    void Start()
    {

    }

    // Update is called once per frame
    void Update()
    {
        float steerAmount = Input.GetAxis("Horizontal")  * steerSpeed;
        transform.Rotate(0, 0, -steerAmount);

        float moveAmount = Input.GetAxis("Vertical")  * moveSpeed;
        transform.Translate(0, moveAmount, 0);
    }
}
After updating script as in previous example, we should be able to change the steerSpeed and moveSpeed from objects properties menu.
Camera
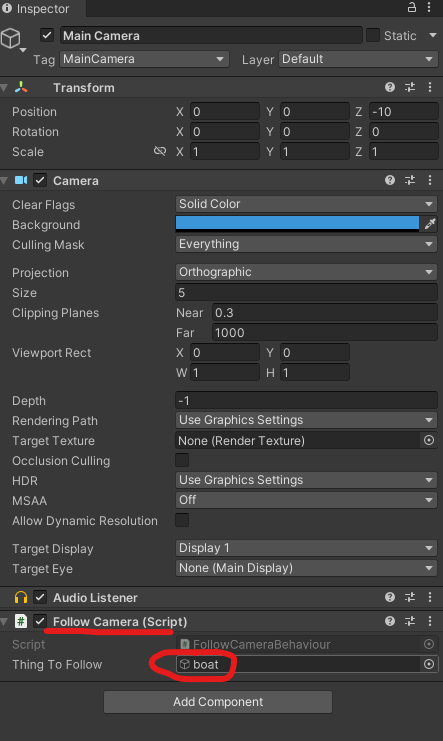
Once we have our motion control set up for the fishing boat, the boat can quickly exit the camera’s scope that currently has fixed position.
What we would like to achieve is that our camera is always focused on our fishing boat that we control. In order to do that we’ll create another C# script that we’ll name FollowCameraBehaviour. Once you have created a new script edit the code to following.
using System.Collections;
using System.Collections.Generic;
using UnityEngine;

public class FollowCameraBehaviour : MonoBehaviour
{
    [SerializeField] GameObject thingToFollow;

    void LateUpdate()
    {
        transform.position = thingToFollow.transform.position - new Vector3(0, 0, 10);
    }
}
Once the script is edited, you can drag and drop it to Main Camera object properties panel (see Boat behavior section). In the Main Camera properties choose Boat as a thing to follow.
In comparison to BoatBehaviour, FollowCameraBehaviour only implements one method LateUpdate. This method is similar to the Update method, and it’s also called on each frame. However, this method is invoked by Unity engine after Update method. In a sense, Update is used for your main logic while LateUpdate is used as a consequence that comes after. As for the method behavior, it simply sets camera position (i.e. transform.position) to the current position of the game object we have set to follow (i.e. thingToFollow.transform.position). In addition, there is a subtract by vector representing (x,y,z) in order to place camera 10 points on z-axis above the current object that we choose to follow.
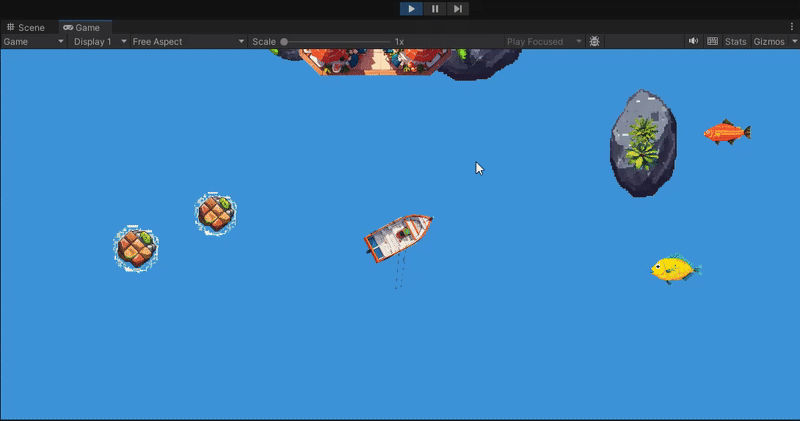
Now if you set Boat as a thing to follow in Main Camera properties we can run the game via Scene and pressing Play button. The result should be as following, where camera now follows our fishing boat.
Conclusion
In this post, we managed to add driving behavior to the fishing boat by introducing steering and moving calculation. Also, we have showed how to make our camera follow the fishing boat while driving around the map. In the next post, we’ll show you how to use collision boxes for the game objects and collision detection.